Intune device renaming using Power Automate
INTUNEPOWER PLATFORMSHAREPOINT
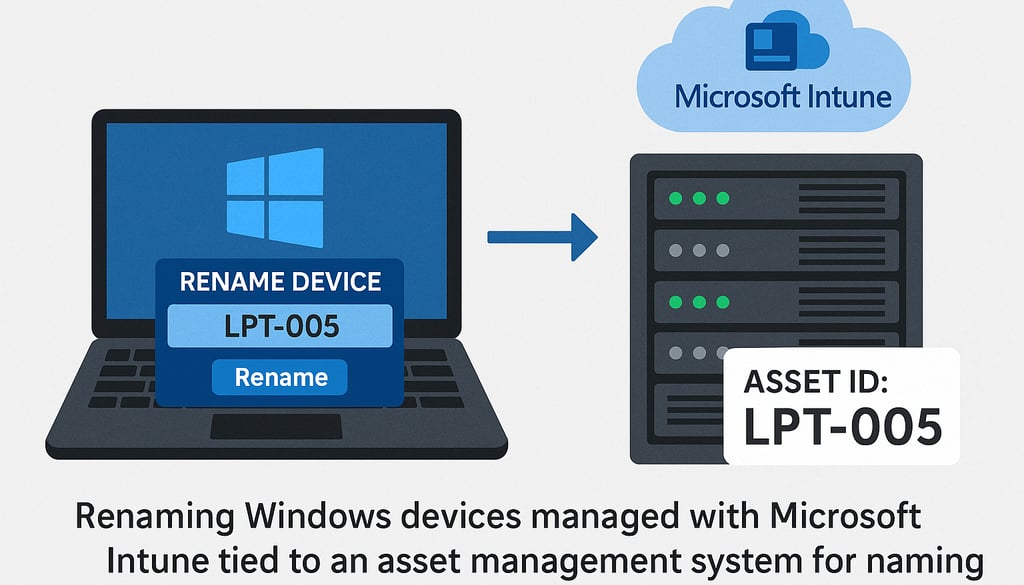
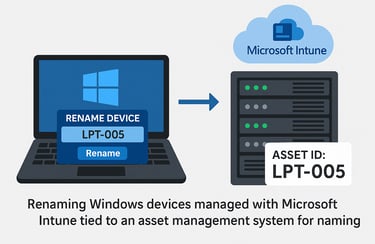
It’s been a age long issue when it comes to renaming Intune enrolled/managed devices in bulk. Yes Intune has evolved to be a great management tool, theres no doubt to this, but companies who have already invested in asset management systems are maintaining device information outside of Intune and Entra too. So when it comes to meeting in-house naming standards there can still be some issues.
When enrolling Windows devices with Autopilot you can make use of a built-in device naming formats but this is limited to templates using %SERIAL% and %RAND% and while Intune also has a built-in bulk action option WHAT if you want more meaningful names or just want to link the name to the asset tags, location codes or user ID’s ????
IT Pro’s have found some creative ways to rename devices outside of the templated approach using things like Entra Automation Post-enrolment, using domain join configuration profiles for Hybrid joined devices and if still using SCCM and MDT (PLEASE migrate to Intune only for simplicity and management capabilty), you can use these to pre-stage the device name before handing off to Autopilot.
In this blog though as a Microsoft MVP for Intune and M365 I want to introduce you a great alternative, using Power Automate to inject a bit of automation and on-going flexible management. Lets face it unless Intune starts providing an easier way to achieve this requirement then introducing a business as usual process has to be the way around this. PLUS you get to maximise your investment in Microsoft Licensing and easily make changes to fit your company needs.
Sure you could create a PowerShell script and deploy to devices via Intune which is a well known way of tacking this issue but again there can be limitations such as not being able access backend systems holding the information you need like the asset tag name you want to use.
To run with this solution you will need:
An Azure App registration
Power Automate Premium Licence (to use premium HTTP Calls)
Access to Power Automate (make.powerautomate.com)
Find the Power Automate flow and Excel template on: GitHub. AND please comment or like and mention me in LinkedIn posts.
Lets walk take a walk through what’s included –
While Im clearly an advocate for the Power Platform using PowerShell is a perfectly usable and viable way to achieve the same or similar goals here, but I like Power Automate for these reasons:
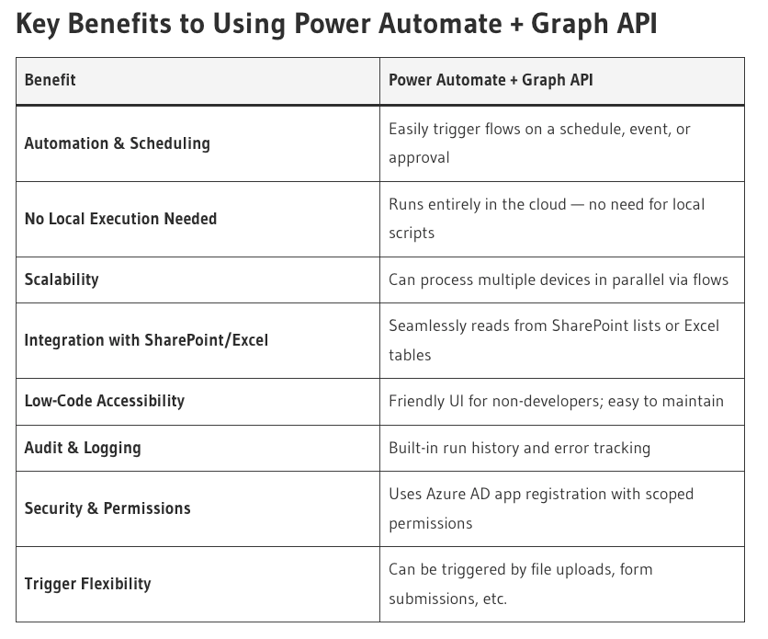
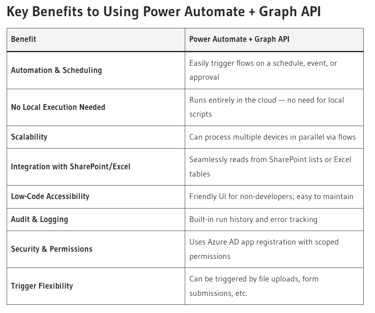
Using Power Automate also aligns with modern cloud-first IT practices. It’s ideal for organisations that:
Want to delegate tasks to helpdesk teams without giving them elevated PowerShell access
Need to integrate with other Microsoft 365 services (e.g., Teams, SharePoint, Outlook)
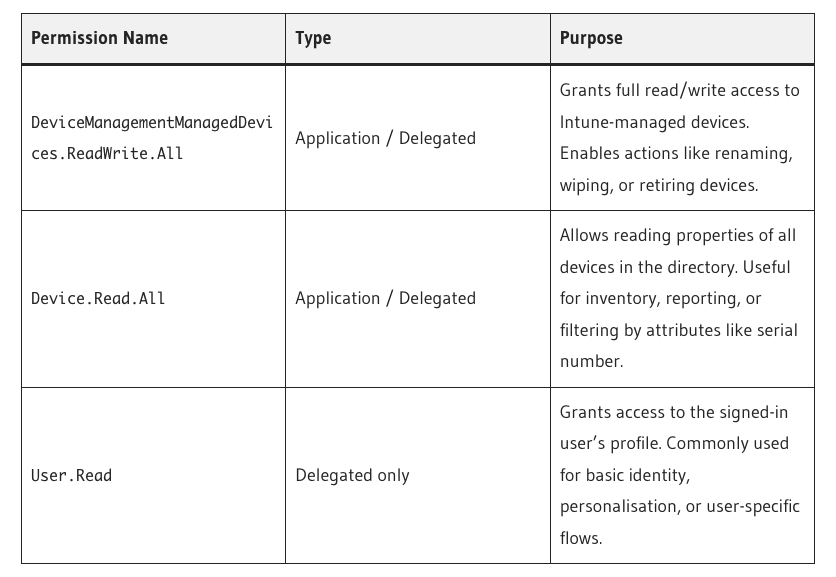
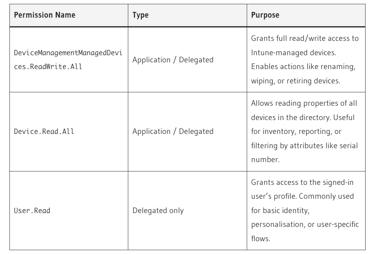
To get started you will first require an Azure Application Registration but the good news is all you need are permissions for:
With that created you will need to capture the TenantID, Client ID and Application secret and either store these somewhere safe like Azure Key Vault or add to a Sharepoint List (locked down for access) or Dataverse. In my case I’ve used SharePoint so I can easily reuse the details for my flows and I avoid the overhead charges with Dataverse.
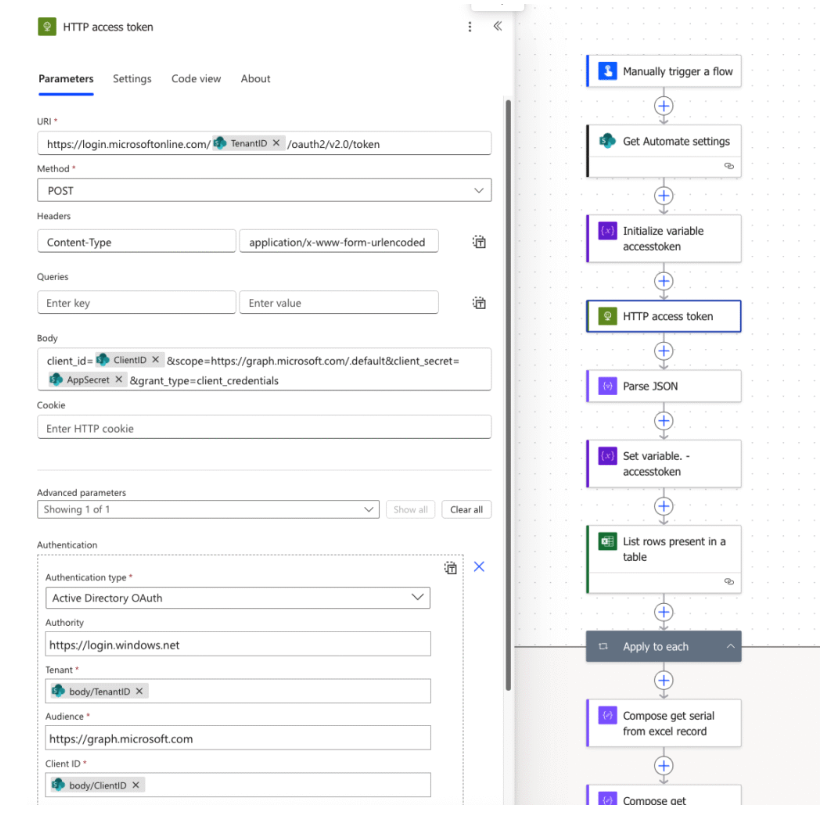
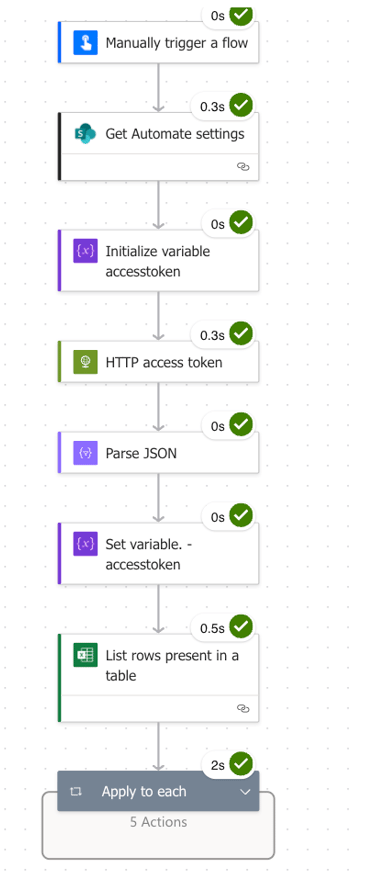
The first step as shown below is to create a new Power Automate flow which can be manually triggered. Note that this is optional though as you may want to change how you trigger this flow to work. You may for example want to integrate this with a Power App or link it to a change / update of a SharePoint record. Power Automate is extremely flexible to suit what ever requirements you have, so please adjust accordingly.
‘Just to note I have also integrated this with my IntuneHRFlow Power App due for release this year, which includes a comprehensive Power App Admin portal for managing / reporting on Intune devices as well as covering Employee Onboarding, Offboarding, workflow and inclusive of a separate Employee HR App.‘
Following this the ‘Get Automate settings’ action retrieves my App registration settings I store in a Sharepoint List which contains everything needed. You can either hard code these settings into variables and use these or create a List as I have and retrieve them using the SharePoint GET action.
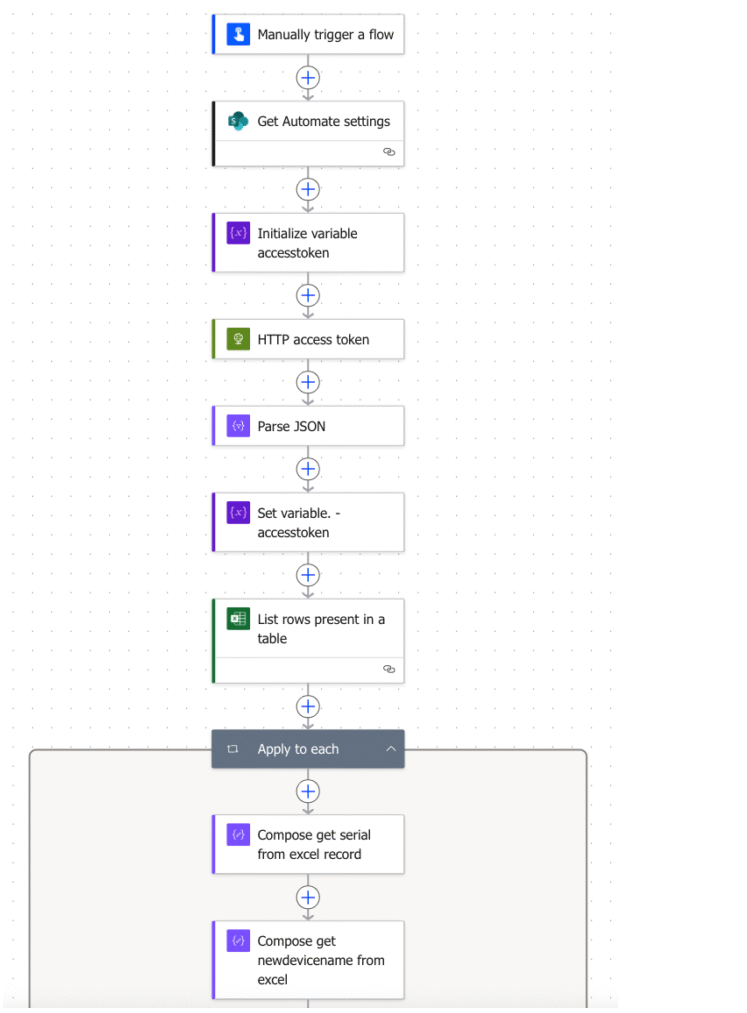
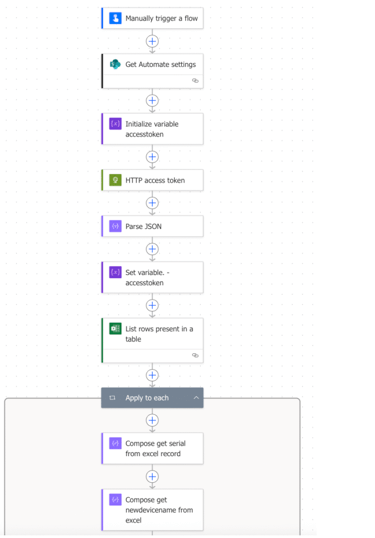
For the ‘HTTP Access token’ step as shown I’m using the Application Registration details already collected to create an access token which provides the necessary permissions to retrieve the device details. The next action is a ‘JSON Parse’ which effectively takes the raw JSON data and transforms it into structured, readable content you can easily work with. The ‘Set variable accesstoken’ step collects the created accesstoken requested which can then be used in the subsequent HTTP actions. You can see the configuration for the HTTP access token step below:
Retrieving Device rename details
The premise for this blog as will be clear by now is we want to bulk change Windows device names already enrolled and managed by Intune to our custom names. Unfortunately there is no easy or native way of supporting custom device naming during an Autopilot enrolment. This goes for Autopilot v2 also, however you can run PowerShell Scripts during ESP which is an added bonus.
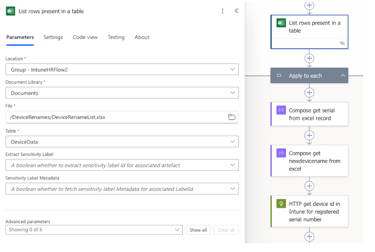
For the solution here, Im using a simple Microsoft Excel document ‘DeviceRenameList‘ as the source to the changes needed. In reality this could be an extract from an asset management system or even be a SharePoint List you maintain. You may even want to dynamically connect to your Asset system using a library connector or custom connector within Power Automate. There are only 4 columns added here but again you could adapt this to your own needs. PLEASE make sure you wrap the data including the header in a table that you name and use in Power Automate.


I have stored the device document in a SharePoint document library which then provides you with history and change details to the document. The ‘List rows present in a table’ action along with the ‘Apply to each’ loop will process each of the present rows and cycle through the remaining actions to process the data. See the config to the document below:

So for every row retrieved by the flow a number of actions are performed:
Retrieve the serial number from the document
Retrieve the new device name to be assigned from the document
Call Entra with a HTTP Get action to find the device using the serial number from the excel document
Retrieve the Device ID registered in Entra
Retrieve the operating system of the device found in Entra
Retrieve the ownerType to make sure the device is enrolled and managed by Intune (Personal enrolled devices will not work with this, thats an add-on for another day)
Update Intune with the new assigned device name.
For every record added to the table in your excel document Power Automate will attempt to match the device in Intune. Please note I haven’t added error checking here so if the device is not found the flow will error. It’s worth making sure you have the correct serial numbers first.
The added Control action checks that the retrieved Entra device has a ownership type of company and the operating system is ‘Windows’. You could however extend this easily to include multiple OS types.
The last step in the process is to perform the rename of the device. This is a HTTP graph POST to deviceManagent/managedDevices which is why you need the earlier permissions. The POST uses the retrieved deviceid to located and assign the rename to the device.
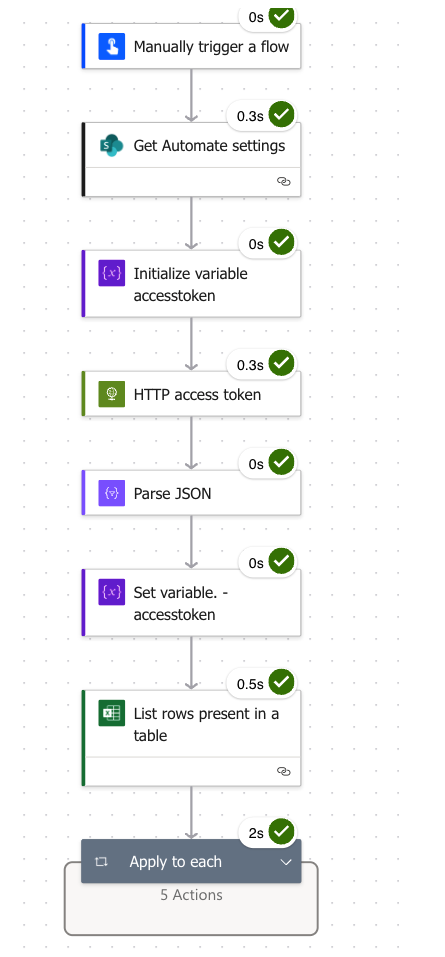
Once successfully run you should see green ticks against all the run actions and power automate tells you the flow ran successfully. When you reach this stage check back on Intune to see that the command has been run successfully. This will confirm the actions took place. Always isolate your testing to test devices before deploying preferably in a test tenant, then test group of users and devices.
A successful command will appear within the Intune page for the specific devices updated. In terms of the change of name this can take time to take affect within the intune portal. It generally waits until until the device has performed its next synchronisation back to Intune with its telemetry data. As a follow up if doing this in the background you could deploy a popup to the users to inform them to reboot their device. Alternatively you can force a sync from within Intune or sync the device from the Company portal app.
As shown in Intune when successful.
I hope this helps you build you Power platform skills and knowledge and please let me know how you get on,


As shown in Intune when successful.
I hope this helps you build you Power platform skills and knowledge and please let me know how you get on,
Microsoft Solutions Provider
Kumonix are a Microsoft Solutions provider helping organisations transform and improve with cloud-based engagements.
© 2026. All rights reserved.
Modern Endpoint Management
Microsoft AI & Automation
Modern Workplace
Business Applications
Microsft 365
Technologies
Power Platform
Contact Information


contactus@kumonix.com


Phone
020 4622 0001


Office
Kumonix Ltd
86-90 Paul Street, London, EC2A 4NE